It’s always wonderful to see a large bird in the yard. This owl visited this morning. We observed it for awhile, and it seemed to be observing us as well. I wish it would catch some more voles that seem to be flourishing in the yard and garden. Hello owl!
I don’t know why this is growing here in the herb bed. It seemed to make an appearance on its own. I didn’t intentionally plant it. I have a practice of just letting unidentified plants grow until I get around to identifying them. My plant app said “Jerusalem artichoke (Helianthus tuberosus).” And it is quite attractive with tall strong stems and long-lasting yellow flowers late in the season. The bumblebees seem to really enjoy it.
So I think I’ll move the tubers to a location where they can spread. Maybe near the driveway. It would be nice to be greeted by a thicket of these yellow flowers when coming up to the house.
It is a true pleasure to admire my harvested onions, all cleaned and separated by color. I’ve been purchasing the Gardener’s Medley onions for the past few years from Fedco. It contains 150 little plants of white, red, and yellow onions. I plant them in one of the plots we have at the community garden. They really grow well. I think they would grow better if I watered them more often (goals).
These should really be hung up in a cool place for winter storage, but for now I’m enjoying having a huge abundance of homegrown onions to choose from for dinner.
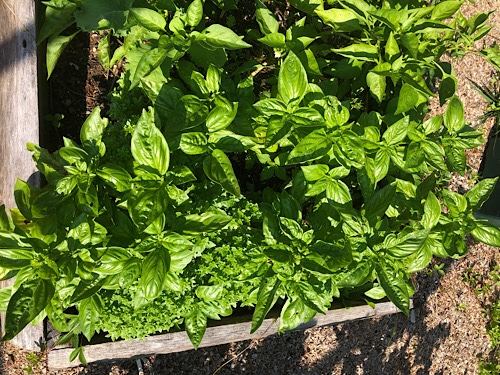
Isn’t this weird? These plants grew from regular basil seed, among the basil plants with normal sized leaves. They smell and taste like basil. In hindsight, I should have frozen them to use in soup or something. But I composted them instead because – too weird.
The hoophouse has been uncovered for the season because we made a bet on warm, wet weather. We had plenty of rain. It was warm, but not the dreadful heatwave some parts of the US got. So the plants did okay. The tomatillos were especially happy. The basil also did well.
But the time comes to think about covering it up for the cold season growing. First step is to clean up the area. Lots of grass and weeds grow up around the edges. Things accumulate there, like wood, sticks, planks, plastic pots, cords, trays, watering cans…
We removed everything and Sam weedwhacked. He should be wearing safety glasses, but he was not. And got a scratched cornea as a result. Which necessitated a midnight visit to the emergency room with eye pain. It was not serious, luckily, and he anticipates a complete recovery.
I planted this rudbeckia in the back flower bed. It’s a problematic area that I’m trying to fill with beautiful care-free perennials that don’t try to take over the garden.
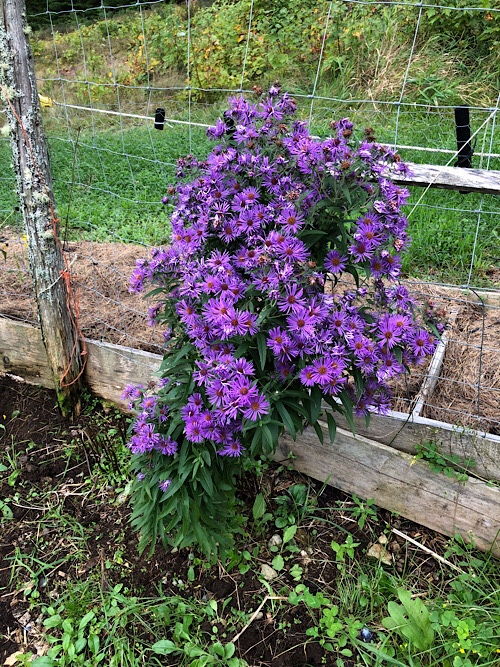
I was so excited to see this aster starting to flower in my perennial bed. I just love the vibrant purple. This is a native plant purchased from Fedco Trees. I divided it into two clumps when planting and both are doing well.
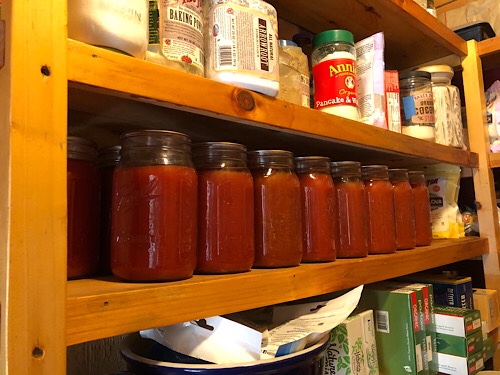
Well, canning is done. Our tomato harvest was inadequate, so we bought twenty pounds of seconds from Happy Town Farm. This worked great to supplement our supply.
Every year, we seem to reinvent the wheel by rediscovering guidelines that make the process more effective. The less guesswork, the faster and easier it gets. By the end of the season, we are pretty good at it. Then we forget until next year, when we start the learning curve all over again.
So here’s an attempt to record a few of the learnings from this year’s canning.
For our process, the rule of thumb is 9 pounds of tomatoes are needed to make a batch of three quart jars of sauce. In other words, 3 pounds per quart. This is before trimming off ends and bad spots.
We clean and heat the jars, then add a 1/2 teaspoon of citric acid, to ensure good acidity levels in the sauce.
Add 1/2 teaspoon of citric acid to jar first
We wash, trim, and rough-chop the tomatoes, then pile them into large saucepan. We usually don’t add any flavorings, assuming we will flavor as needed when using the sauce. This also reduces the marking and notating necessary on the jars. This year we didn’t do any marking on the jars – a time savings, but we’ll have to use up all of them this season. If we don’t, I’ll put the year on them before we make more.
When the sauce has cooked down into a more liquidy state, we use the food mill to remove skin and seeds. Then replace the sauce in the saucepan and cook down a bit more. Usually it is close to ready after milling and just needs some reheating.
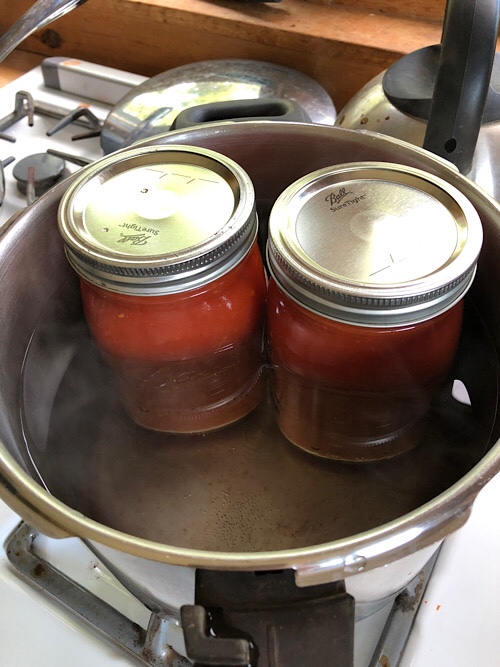
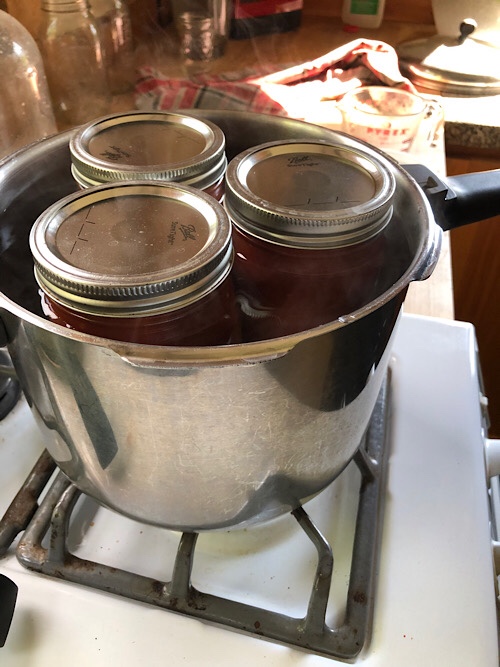
To fill three jars, the batch of sauce should come just below the rivets on the large saucepan. If there’s extra sauce, we save it in the fridge and use it within a few days. The pressure cooker holds three jars of sauce. Start out with 13 cups of hot water in the pressure cooker. This amount will avoid overflow as the jars are added. (We do not bring water level over the top of the jars.)We ladle the hot sauce into the warm jars using a funnel.Leaving some headspace. Wiping off the edge of the jar to facilitate a good seal.
The lids and rings should be clean and warm. Use new lids every year.
Note: they can be hard to find when canning season is in full swing, so stock up if you find them.
Note: we tried Pur brand lids from China this year because they were all we could find for awhile. They did not seal well. Avoid!
Finger tighten. Three jars set to go in the pressure cooker.
Pressure cook for twenty minutes after pressure is reached. Let pressure release naturally. Then take out jars and tighten rings to aid sealing. Let jars cool on counter. The dimple on the lids should make a popping sound and depress when vacuum occurs.
I think we totaled 19 or 20 quarts this year. Not sure because we used some before canning season’s end.
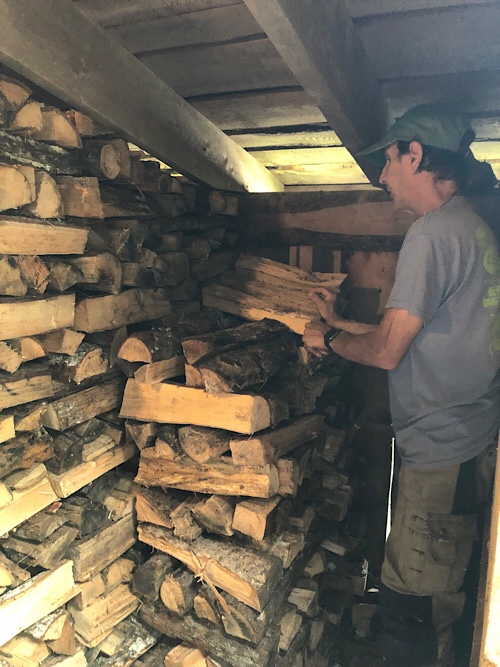
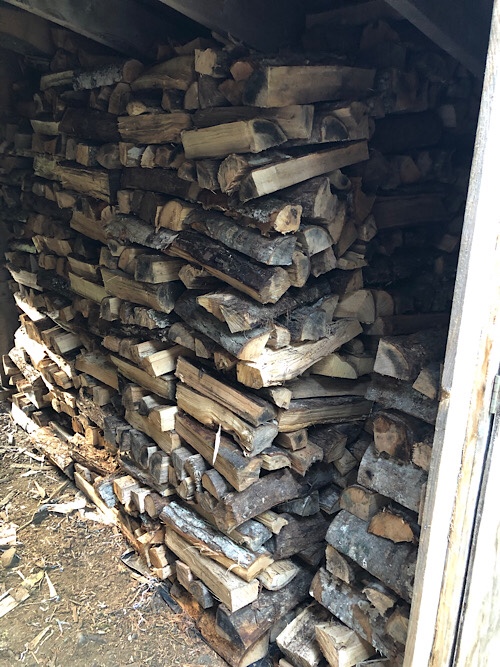
We haven’t started burning wood in the woodstove yet. But are starting to prepare for the burning season. Moving some seasoned wood from last year out of the woodshed and into the house will make room for stacking the new cords in the woodshed.